Thursday, January 31, 2013

Square Knot Bracelet In Bronze

Sterling silver is quite expensive, so I've decided to experiment in other materials that are not only cheaper, but also quite cool actually. This piece was made in bronze and it's called Square knot based on the B2 weave. It's quite fun to do and awesome to wear. I love how is rather loose on the wrist and kind of fluffy. Now try to do this heavy one in sterling silver!

The clasp is an antiqued bronze square clasp. Not sure yet if I'll keep it. The color is a bit off compared to the bracelet, but it does make a nice contrast. Bracelet measures 19.5cm (almost 8") and it's made of 4.4 AR various size bronze rings (bought from TheRingLord).


Wednesday, January 30, 2013

Byzantine Wrapped Earrings

A quick pair of sterling silver earrings done in the chain maille Byzantine weave. The beads are amethyst with a very lovely color. Earrings length including the ear wire is 6.5 cm (2.5"). All metal, including the ear wire is sterling silver.

For wrapping the bead in the semi-herringbone weave I used a free tutorial by Heidi K. (link to her tutorial is in my Best free 4 herringbone weave tutorials post, reachable from the sidebar of this blog.)


Tuesday, January 29, 2013

Gothic Silver Chain Maille Pendant - YOJ Week 5

This silver pendant is made for the YOJ Week 5 challenge with the theme 'deja-vu', aka before and after. About 4 years ago when I dabbed a bit in chain maille, I made a Rondo a la Byzantine pendant with a goldstone bead wrapped at the bottom. I never really did anything with it afterwards, and I left it forgotten for 4 years.

Now looking at some of my older pieces to work up for the challenge, I found it tucked in a ziplock bag.

So here is the before and after. Bad picture quality for the before as I only snapped quickly a shot of it in the evening so I have something to show for the challenge.

The new piece has a smaller black onyx wrapped bead. All metal is sterling silver that I cut in jumprings.


Thursday, January 24, 2013

Byzantine Knot Silver Bracelet

Here is a bracelet I finished last night. Tumble polished it and took pictures of it today. It's a weave that I learned, I saw a bracelet just like it and was curious as to how they did it. Found the weave at Mailleartisans, and here is the result.

I quite like it, however personally I like daintier chains than this. However when worn is quite beautiful indeed.

The rings I cut have these stats: 0.9mm 4.27 ID, with an AR of 4.74 (this is just for me really, if I want to do another one, to use this as reference). The bracelet measures 19.5cm (7.5") including the lovely silver heart clasp which I bought from Etsy from a wonderful seller a while ago.

Note: the Byzantine Knots weave was invented by Christian Dietrich) and if anyone wants to learn this weave, there is a also nice tutorial by Zili on Mailleartisans.


My First Full Persian Cross

I was always jealous of folks who could do the Full Persian cross, and I couldn't because the full persian weave always eluded me. Well, not anymore. I've learned the weave from Spider's DVD and then went off and learn the cross from a tutorial from Mailleartisans, I think. Now that I know the weave, making the cross is extremely easy, I might add.

Used some practice jump rings from The Ring Lord, so the closures are not the best. The next one is in silver.


Sunday, January 20, 2013

Butterfly Earrings - YOJ Week 4 Project

Here is my 4th week Year of Jewelry 2013 project, with the them "Not from the Mall". When I started this pair of earrings I only knew I wanted to do the butterfly weave, but I had no idea how they will turn out. I used at least 3 different ring sizes, and finally decided on the turquoise briolette.

Speaking of the briolette, this is also a good example how to cheat when you can't wrap a briolette worth beawns (that is me). After all these years, wrapping a briolette the right way eludes me. I've watched countless Youtube videos, looked at various tutorials, nothing helped. So I've settled on a bit of cheating. And to be honest, I kind of like the result.

Still have to tumble the earrings as the silver jumping are not quite shiny yet. I hope I won't destroy the turquoise in the process.


Saturday, January 19, 2013

Rosetta Chainmaille Bracelet In Sterling Silver

I liked how the Rosetta weave looks from the first time I saw it. It's an easy and fun weave to do, one that I haven't tried until now. And I quite like the result. It looks slightly like a variant of the Byzantine weave, but it's woven up completely differently.

It's very sleek and soft when worn, it's becoming one of my favorite weaves.

This bracelet is made of sterling silver, measures almost 19 cm (7.5") and the jumpring dimensions I used when I cut them from the silver wire were: 3.84 ID for the 2 in 2 chain and 3.5 ID for the 4 side rings, wire of 1mm WD.


Monday, January 14, 2013

Week 3 YOJ 2013 - White Pearl Sterling Silver Earrings

When the new theme for the week 3 in the Year of Jewelry Project came up: "music", I knew just what I wanted to do. I've recently seen a simple  but very cute pair of earrings that were last year auctioned off at the Julien Auction House. The earrings auctioned off used to belong to the late diva Whitney Houston, which she wore while filming the Bodyguard.

I have a few freshwater pearls that I got not long ago, so my fingers were it itching to do something with them. And this is the result. A simple design that goes well pretty much everywhere: a wedding, a party or worn with a little white dress or jeans.

Materials are freshwater pearls, all metal is sterling silver including the ear wire. Length of earrings with earwires is close to 5 cm (almost 2 inches).


Saturday, January 12, 2013

Week 2 - Grace - The Year Of Jewelry Project 2013 Entry

Here is my second week's entry in YOJ project 2013, with the name Grace. For me grace is something simple, without too much fluff and extras, something elegant and classic.

So for this entry I made a pair of silver earrings with chain maille mixed with wire wrapping. Chainmaille weave is JPL (Jens Pind Linkage) and the wire wrapping part is herringbone weave surrounding the cute onyx beads. Not the best pics, I'll try to take better later and post them as well here.


Wednesday, January 2, 2013

Stepping Stones Bracelet In Nickel Silver

Here is my Stepping Stones bracelet - I have entered it in the first week of The Year Of Jewelry Project Facebook group.

I'm still working on the sterling silver one based on the tutorial I wrote for it, but as my silver rings finished and I was not in the mood just now to cut more, I started and finished this piece. It's quite heavy, even the big rings are doubled-up. This piece is made of 2 size rings only, all the connector rings being of the same size. I had some nickel silver rings that I bought earlier on from The Ring Lord, and that's what I used here.

Love this weave, I can't wait to finish the sterling silver bracelet as well.


Tuesday, January 1, 2013

Stepping Stones Weave Tutorial - My Way Of Doing It

First of all Happy New Year to everyone reading this blog!

This is my first post this year and a tutorial for the Stepping Stones chain maille weave for an alternate way of doing it for those (few) like me who are math challenged (despite my mom being a math teacher, lol).

I made a Stepping Stones bracelet a few days ago (design by Corvus Chainmaille) based on the free tutorial from Mailleartisans, which is very easy to do. I created the bracelet without a problem - until I wanted to do a pair of earrings with different size large rings which assumed a different number of small connector rings to attach the large ones to - especially when working with 3 ring sizes, as opposed to 2 sizes that the tutorial from Maillerartisans is based upon.

While looking at my bracelet for a little while, I realized that the whole thing is nothing but a 2 in 2 chain with some additions. I deconstructed it in my mind, and hopefully this tutorial will help a few - it is a bit slower going because I did it in 4 different phases, but some steps can be done together once you read through the basics.

So first here is the silver piece I started with, in an overview as to my progress so far. I will also post the bracelet once it's fully woven together. I used here 3 sizes of rings:
- large rings  (I used 1.5mm rings with ID of 6, for an AR of 4)
- medium rings (I used 0.9mm rings with ID of 3, making it a 3.28 AR)
- small connector rings (I used 0.7mm rings with 2.5mm id with AR 3.5)


Above you can see the bracelet in different stages of 'being', and some silver rings that I'm using to work through the piece as well.

Step 1 - Create a simple 2 in 1 chain in two ring sizes. Attached to this medium size ring are two small rings (the connector rings). Make the chain longer than a regular bracelet size, since the addition of the big rings will curve your chain and make it shorter.


Step 2 - Double up the medium rings so you end up with a long 2 in 2 chain as shown below. So you have 2 med. rings connected to the two small rings.

Step 3 - Start adding 2 small rings on one side of the medium rings, like shown below. How many of these 2 ring sets you will add will depend on how big your large ring is and how curved you want your piece to be.  The original tutorial calls for 4 double-up small rings, I used 6 in this example. So basically the medium rings will have 3 sets of small rings on them - two sets as connectors, and one set lose in the middle (as shown in the image below). Once you have the 6 double rings (or how many you want your large ring to be connected to), when you add the next set of 6 rings, add them to the opposite side of the medium size rings.


Step 4 - Now add the large rings. So far I've added two large rings for each 6 sets of small lose connector rings. As I go along, I will keep adding more.

One other reason why I prefer doing it this way is that in case I want to add a different size of large rings or attach it to a different number of small connector rings (e.g. a focal point on a necklace), I can decide right there how many connector rings to add as I progress with the piece and see visually where I am at the moment.


While this is quite basic, maybe it's the way my mind works, but this is how I could make sense of it all. I hope it does help someone mathematically challenged like I am :)

Monday, December 10, 2012

Finally Learned HP3 In 1

It took me quite a while, but finally I've learned the HP 3 in 1 chainmaille weave. It's not easy to start, but Spider's second DVD makes it almost a breeze. Of course it also helps that the AR of the rings is around 5, so you're working with larger rings to start with, so you can keep the first few rings between your fingers without letting them slip.

Made my first chain in bronze. Not very happy with the closures, reason being the rings I got about 4 years ago from TRL in a jewelry kit, where the ends have all burrs and are pointed. Very bad quality. I should have bought instead saw cut, but what did I know at the time.

Anyway, here is my first half persian 3 in 1 chain, regardless of the closures, I'm quite pleased with it.


Sunday, November 25, 2012

Zigzag Silver Chain Maille Bracelet

This is a simple European 4 in 1 weave in a zigzag pattern. While I've seen diamond shapes and grape shapes, I haven't seen many (actually any) zigzag shapes in this design. The pictures really don't make the bracelet justice. It's really sleek and elegant.

Measures 19.5 cm (7.5") and I love how it's a bit lose on my wrist. It's really comfy. Made of sterling silver.


Monday, November 19, 2012

Byzantine Spikes Chain Maille Necklace

For me making jewelry mostly means wire wrapping and chain mail. I used to bead early on, but the beading bug completely left me at some point. So wire, mostly silver wire, is my real passion. I'm glad that during the last few years of absence this passion hasn't left me.

This time I'm back, with a few 'warm up' chain maille pieces that I did entirely hand-made (except the clasps). I cut the sterling silver wire into jump rings, which I've then used to create the jewelry below. All sterling silver.

In this post I'll showcase the necklace, a mix of byzantine 'spikes' with 2 in 2 chain. Initially I wanted to make it all the way through in byzantine, however the choker was becoming too heavy as it were. Now it has just the right weight without it being overwhelming. It measures 44 cm including the clasp (17.5"). Made from 19 ga (0.9mm) silver wire on 3.5 mandrels. About 3.8 or so AR if I remember correctly. The large rings are 1.5mm WD with 6mm ID with an AR of 4.

I know the 19ga wire size is not the most common one, but that's what I have in hard temper right now, so that's what I have to use for the moment. It's not so easy though to find too many chain maille weaves due to the rather limited amount of mandrels that I currently have combined with this particular wire size.

Anyway here is the necklace on display.


The second photo is not the most flattering one, but it shows the clasp, all sterling silver.


Thursday, October 18, 2012

Round Waves Earrings With Red Garnet

Back again to making jewelry. Sometimes I need some time off when I feel I'm getting bored, or tired or lacking energy. Plus there were lots of things going on in my life, so I took a leave of absence. However my fingers were itching to do something creative again, so I've picked up one of Nicole Hanna's tutorials and made this pair of earrings. She used studs, however I prefer danglies.

The earrings are made of sterling silver, the two gemstones are red garnet and in the middle are two freshwater pearls. The garnets are really cute and sparkle when held up against the light. Earrings measure almost 5 cm (2 inches) with the earwire (also handmade from sterling silver).


Monday, July 9, 2012

Been Away For A While

I'm sorry everyone for the rather long absence. A lot has happened here, and sadly not much in terms of jewelry. I've been away in the hospital and then to doctors for quite a while (lung problems) - I'm much better now. Also I've just come back from a holiday abroad, where I spent time with my family in Hungary.

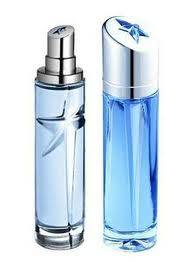
What else is new? I've got the 'perfume bug' and I'm currently adding new gorgeous perfumes to my collection as we speak. Yeah, it's expensive, but I love it! Just got myself a second bottle of Innocent by Thierry Mugler (a toned down version of Angel), and I can't get enough of it.


In terms of jewelry, the price of silver has increased quite a lot, so I have to stock up on it again before I make more pieces - why oh why does it have to be so expensive and why can't it for once decrease in price? *sigh*

Oh btw, just checked Jewelry Lessons site to check out new goodies, and what's with the new Premium membership option - is it worth upgrading?

Friday, October 21, 2011

Got Some Semiprecious Gems To Play With

I've participated in a Halloween Tarot exchange with a surprise partner, and I've just received my package yesterday. I guess my partner saw that I am making jewelry because along with tarot decks, a Zen music CD and some other goodies, she also put me a few gemstones to play with.

They're so beautiful, I can't wait to start wrapping them!

I've been a bit busy over summer with other things, but I should be back on track again soon. My fingers are itching to do some more wire wrapping with gemstones.

Here are three pictures of the goodies. The first is everything in the package, the second one shows only the gems and the last one the cab enlarged.

They are: garnet, amethyst, moon stone, quartz and the the cab is a beautiful jasper. I love the jasper cab!


Thursday, October 20, 2011

Being Aware and Safe When Buying Jewelry Online


Jewelry – especially when you select real and expensive pieces for your collection – is a major investment. As with any great investment, you want to know where your money is going and what you will be getting in return.

Since buying jewelry online is becoming increasingly popular, this post will detail the important aspects online shoppers should keep in mind before making any final purchase decisions.

Vetting Jewelry Sites

While there are multitudes of online jewelry shops, it is important to give your business to one that you can trust. Look around for independent reviews of the shop’s behavior and jewelry quality – reviews that are not on the site itself. If you can find a friend who has had experience with the particular site you are considering buying through, you can be sure of getting an honest opinion. Also check with the Better Business Bureau.

Finding Pieces That You Can Love

After you find a site that you can trust and a piece that you can’t live without, take a moment. Don’t whip out your credit card right away. Print out a picture of the piece or pieces of jewelry and visit local jewelry stores.

Chances are you’ll find better prices online, but that doesn’t matter if you discover that you don’t like the piece after you have it in your hands. Even an online store that has a great return policy won’t refund shipping and handling or insurance costs.

Trying on a similar piece of jewelry in person can help you to know whether it is worth your money.

Get What You Pay For

When shopping online, make sure that you are getting real precious metals and gems. Make sure that you will receive certification or some other form of official guarantee for any pieces purchased that are supposed to be real, such as diamonds and expensive precious metals.

Look out for creative gemstone names, as these are a big warning sign in regards to gems that are not exactly what they claim to be.

For example, blue tourmaline is often labeled as Brazilian sapphire and gems called Manchurian jade are really soapstone. This is true for many gems.

Emeraldine, while it might be a beautiful green, is really chalcedony that has been dyed, and an Alaska black diamond is simply a piece of hematite. If the price seems to be too good to be true, it probably is.

Return Policies and Warranties

Always be sure that the jewelry site you shop with – whether a US or a Canada jewelry store or a site based in another area of the world – has a good return policy. The most common length of time for returns is 30 days, but make sure before you make your purchase.

Some of the best, most well-known online jewelry stores also have lifetime warranties on the pieces that they sell. Not every shop has this feature, though, so look before you leap.

If the shop you are considering purchasing from has no provisions for item warranties, no return policy, or simply doesn’t feel right, reconsider making that buy. It might be wise to work with another online jewelry store.

Just a little research and careful thought can help you to buy jewelry online safely, meaning you won’t have to hesitate when buying in the future.

Saturday, August 27, 2011

NanoStyle Cubic Zirconia Jewelry - Gold With Crystal - Real Craftsmanship And Style

Being an artisan silver jewelry designer, I don't usually go out of my own comfort zone to look at anything else but wire wrapping or chain mail pieces. However this time I had to make an exception, and I think you will agree with me when you see what I have to show you below.


I'm talking about a cubic zirconia piece that I recently got in the mail, which really caught my attention earlier on. The reason why I instantly loved this piece was twofold:

First, from the pictures alone I saw that it was an exquisite piece to wear on your neck, and second, well, Taurus is my astrological sign and I have a weakness for everything that has to do with my star sign.

I got the package in the mail just the day before going off for holidays (went to Peloponnisos in Greece, will post a few holiday pictures soon), so I only opened the package for a quick peek before heading off.

Fastforward 2 weeks. I'm back and eagerly opening the package and I start pulling out the things from it.

First the beautiful box with the amazing cubic zirconia taurus pendant. Next I have an adorable tiny magnifying glass, a very useful keychain and the only thing missing was a small sample of local sweets that I could not resist taking with me when I went off on my holidays (I'm a sucker for sweets, can you blame me?)

Upon examining and trying on the Taurus pendant, I realized how truly exquisite and unique it is. It is made using a new technique of engraving 24kt gold onto semi-precious stones, such as cubic zirconia and onyx. The engraving is tiny and when you use the magnifying glass to enlarge it, you see the wonderful craftsmanship that went into seamlessly merging gold with crystal into a final piece.

So without further ado, here are the pictures I took from everything that came into the mail.


Knowing my poor skills at taking great pictures and possibly not giving this piece justice, here is a link to the Taurus zirconia pendant that I received. The one I have is made of clear crystal, but look at the other mesmerizing colors available in blue topaz, opalite and light amethyst as well.

I had a tough time deciding between clear crystal and amethyst, but finally I went with crystal, figuring that this is the color that matches pretty much every top or dress that I will wear no matter the occasion.

Oh btw, don't forget to check out their Facebook fanpage and Twitter page and sign up to their newsletter which will keep you updated with any new collection that they bring out. It's worth keeping an eye on their new stuff.
Related Posts Plugin for WordPress, Blogger...

Search with Google

Custom Search